18 Using Microsoft Teams to Foster Group Collaboration
Tanya Wakelin
Introduction
Microsoft Teams is a powerful teamwork-oriented cloud-based tool that brings together simultaneous document editing, chat, video conferencing, project management tools and third-party apps into one shared workspace. Using Teams as a component of group assignments empowers students to drive their own success and adds value to student learning by fostering necessary 21st-century skills. Adams Becker, Pasquini, and Zentner (2017) referenced the following five skills needed by students in 2020: “problem-solving, critical thinking, creativity, people management, [and] coordinating with others” (p. 3). Microsoft Teams supports the development of all five skills, amplifying students’ voices during the process. In industry, workplace collaborators are frequently chosen based on expertise and complementary skill sets; it is, therefore, necessary for students to develop skills to collaborate productively in their post-secondary environments.
Prior to the introduction of Teams at Durham College, students used a mixture of tools to coordinate, communicate and manage their group projects such as WhatsApp, emails and Google Docs. With Teams, collaboration can occur within a single shared hub. Students can create a project plan (people management), collaborate on a document (coordinate with others), host video meetings (problem-solving) and add a third-party app such as FlipGrid, Quizlet, Nearpod, etc to support their project (critical thinking). Faculty can choose to use Teams to group their students so they can monitor their progress, or alternatively, students can create their own Team.
Some examples of use cases in higher education include capstone projects, large team projects, work-study, collaborative in-class assignments such as creating a mindmap, etc.
Resources
- Microsoft Teams account
- You may use your institution’s subscription through Office 365 (if available)
- Or, create a free subscription for Office 365 for educators and students.
Steps for Implementation
Step-by-step instructions on how to create a Team
To create additional Teams using the first Team as a template
Instructing students to login
Step 1.
If you do not have an institutional Microsoft Office 365 (O365) account, create a free account. Access the free O365 subscription for students and teachers by entering your school email address. Microsoft will send you an email with instructions for creating an account.
Step 2. Go to Office.com and log in.
Now that you have an institutional account or have created an account, go to Office.com and enter your credentials to gain access.

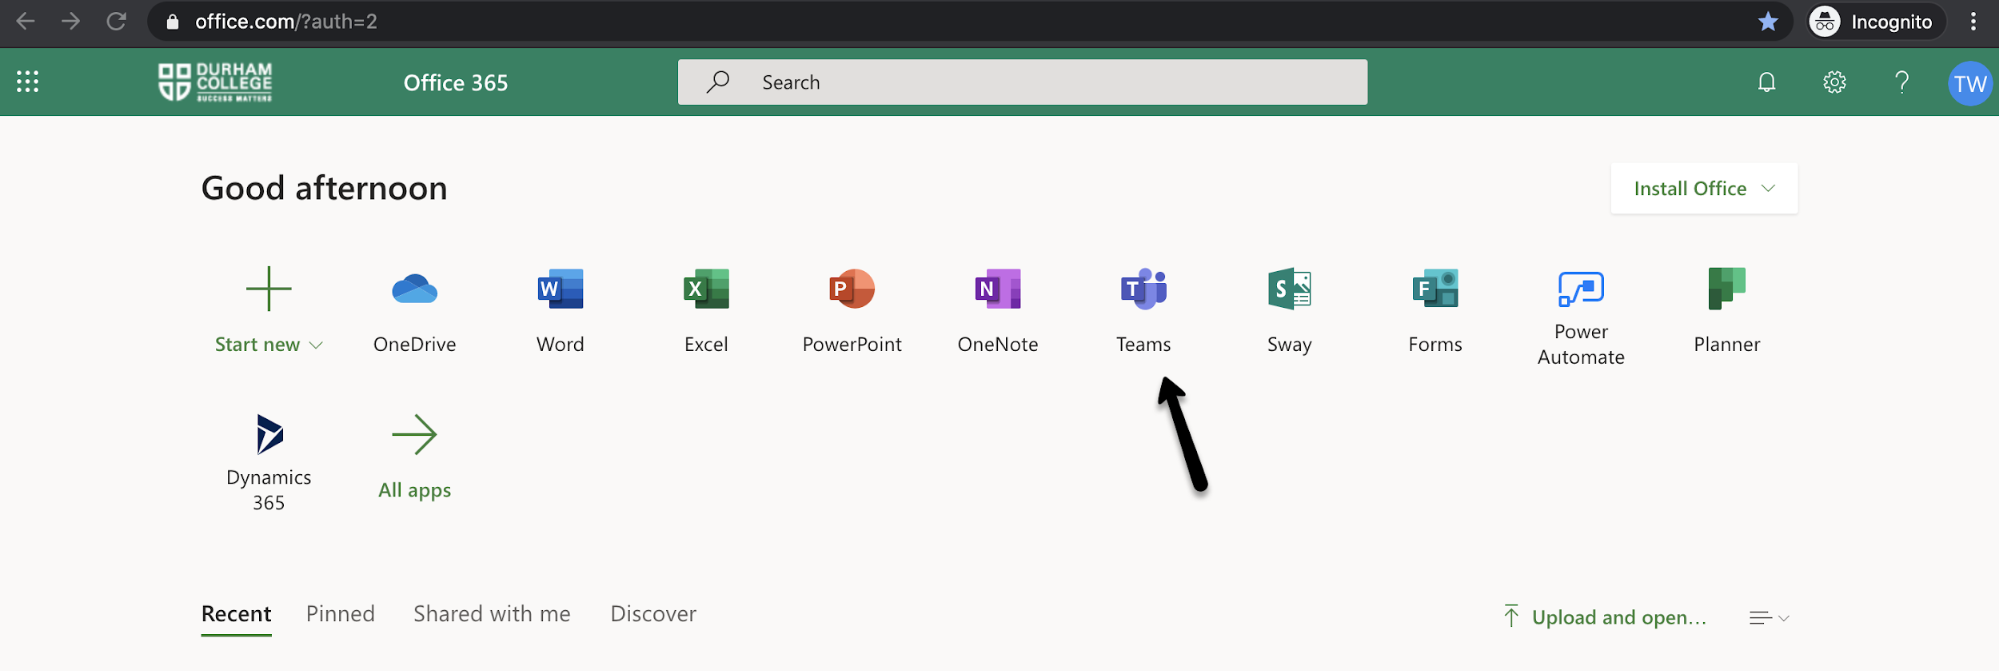
Step 3. Open Teams from Office.com
- On the landing page of Office.com, select ‘Teams’.
- This will open Teams in a new tab.
- You can choose if you’d like to use the web version or download the software to your computer. There are slight variations in the two versions, the main variation is dependant on the browser as video meetings are not supported in some browsers. Teams can also be downloaded from the Google/Apple store for mobile devices.
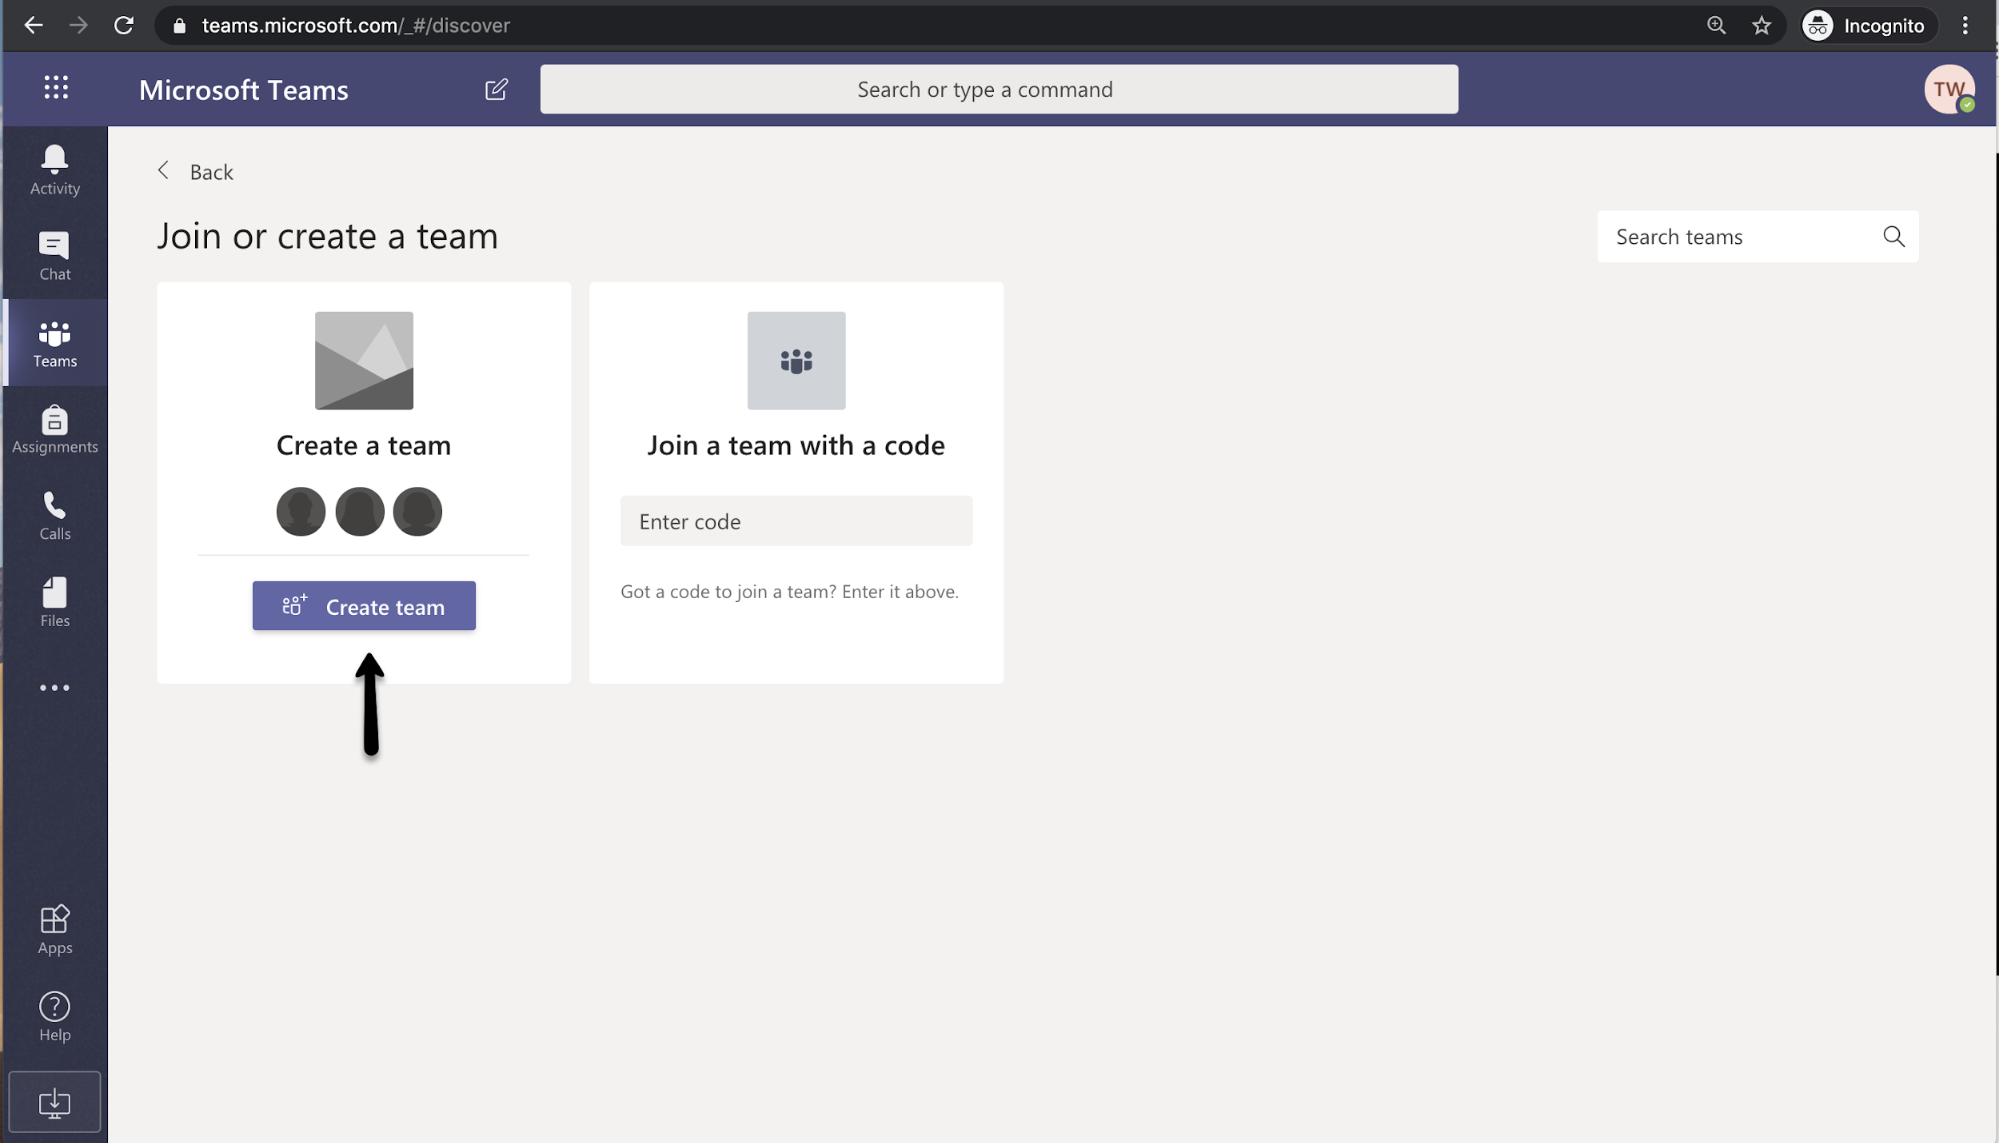
Step 4. Create a Team by selecting ‘Create a team’ and choose your team type.
To start creating a team, select ‘Create a Team’. This will open a pop-up window which asks you what type of team you’d like to create. This step is important as it determines which features will automatically be turned on.
- For example, if you wanted to create a ‘Class’, the Team would automatically have a class notebook and an assignment tab. Focusing on your educational goal in using Teams will help you determine which type to choose. Using a ‘Class’ means the teacher plays a larger role in moderating content.
- For the purpose of this exercise, we want students to be able to independently work together. For this reason, a suggestion would be to use the ‘Other’ team type, where all team members have equal permissions to read-write. For more details on which type of team is right for you, please visit: https://support.office.com/en-us/article/choose-a-team-type-to-collaborate-in-microsoft-teams-0a971053-d640-4555-9fd7-f785c2b99e67
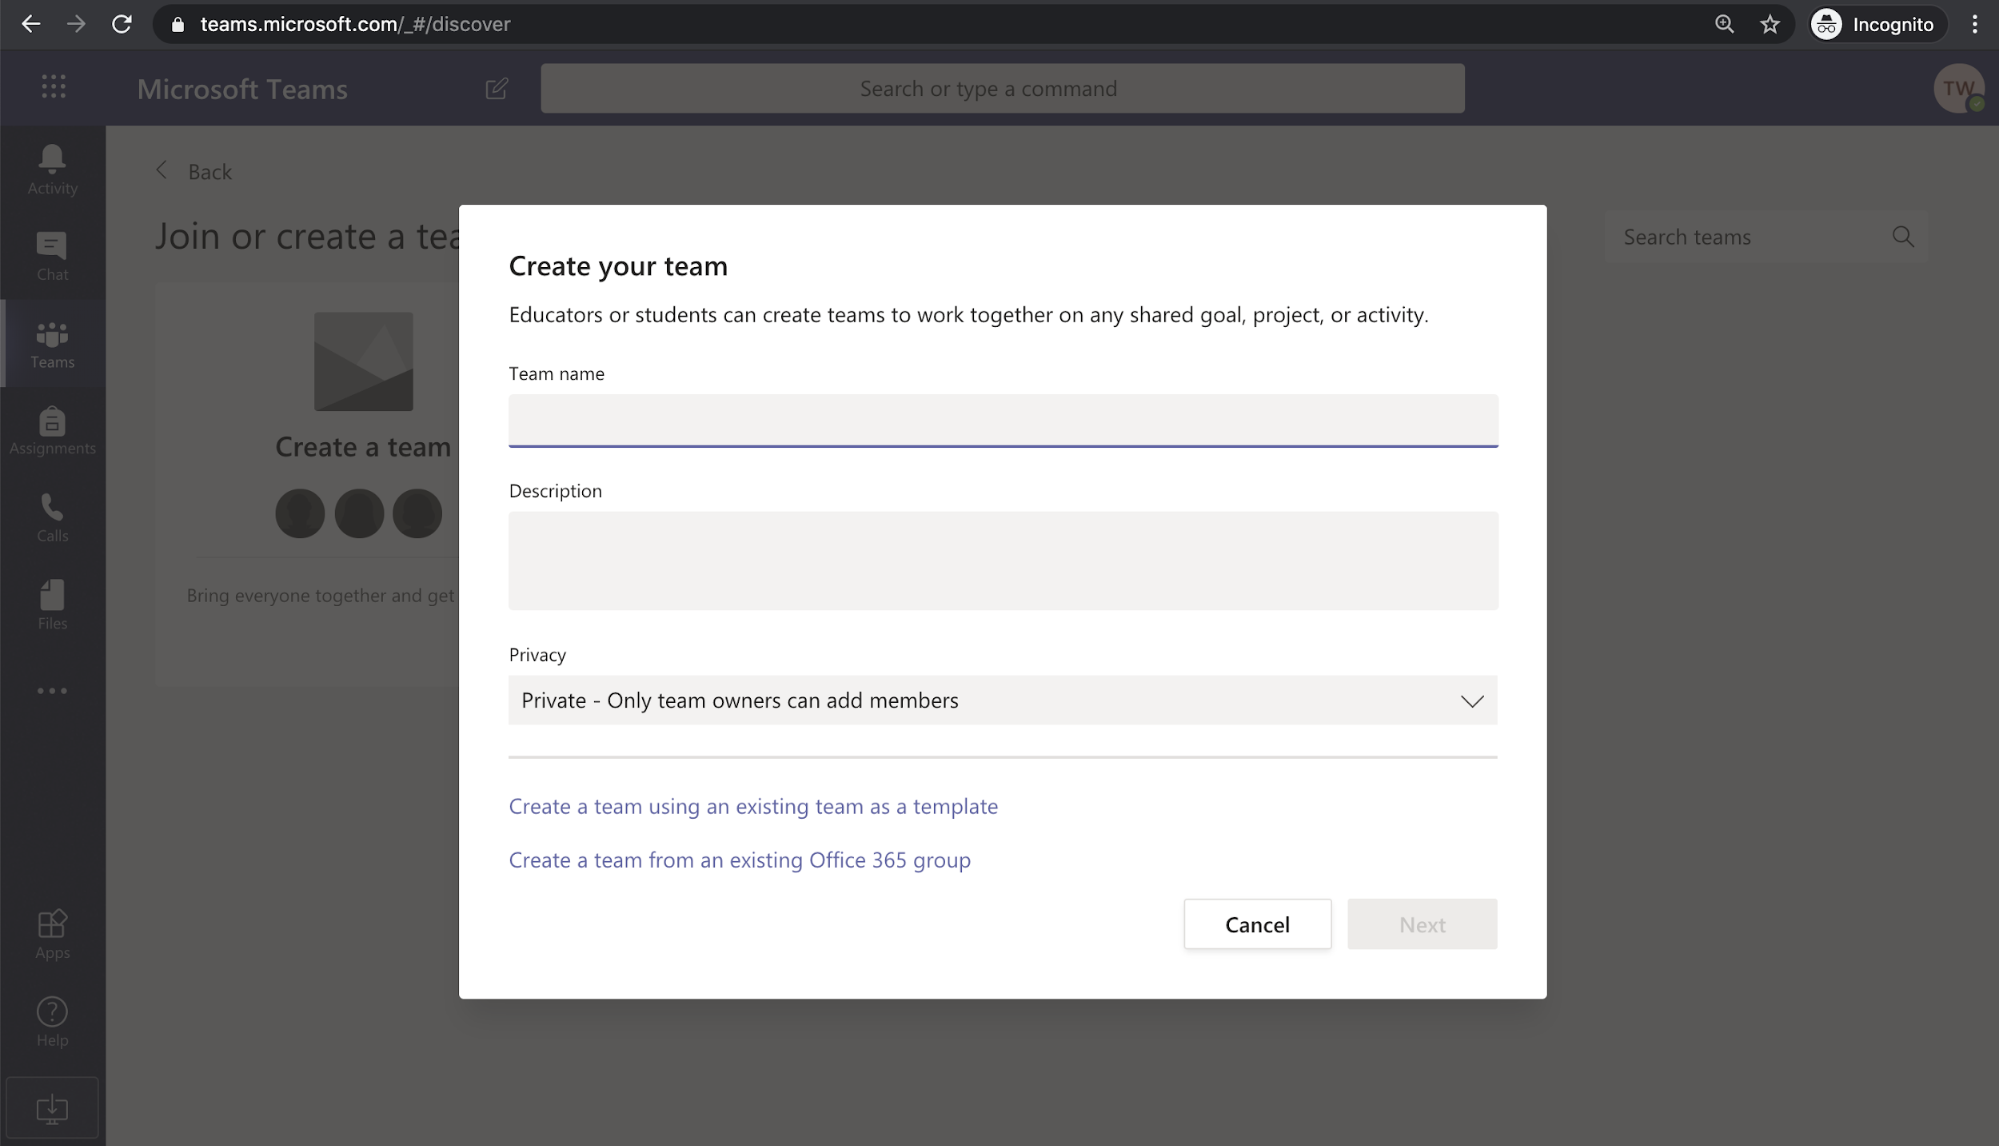
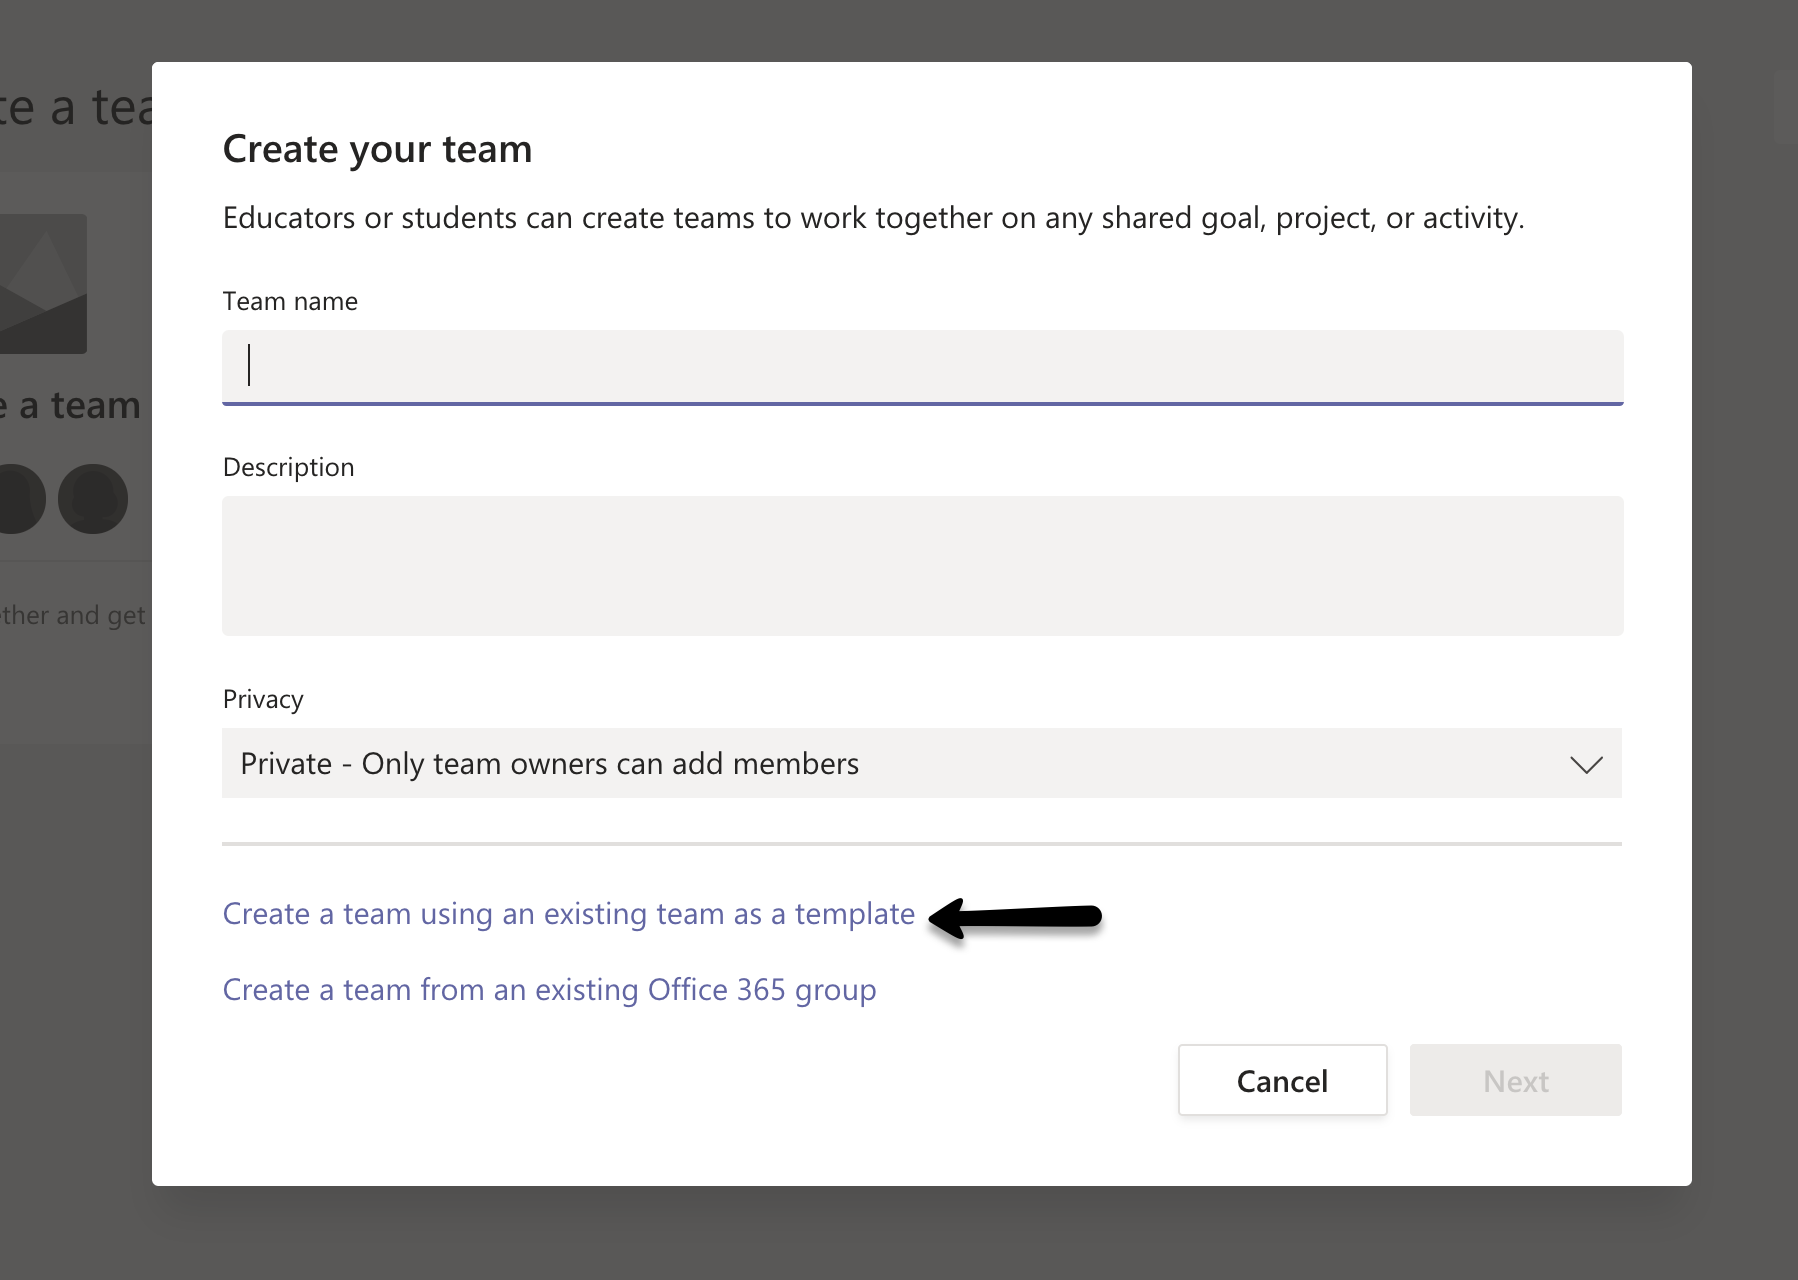
Step 5. Create your team
Part of the set-up process is entering the team name, a brief description and if the team is private or public. Keeping teams private is the best choice for group work. During this step, you can also create a team using an existing template. If you use Teams frequently, you may want to consider creating a template. The set-up process will then ask you to add members by typing in their email address. For simplicity as we don’t always know our student’s emails when creating assignments, skip this step for now.
Step 6. Create how you want the team to be structured
Now that a team has been created, you will see the ‘tabs’ based on the team type you selected automatically. A ‘tab’ is used to add additional tools to your team, including external tools like Trello, MindMeister, Polly, as well as Microsoft tools like Planner, OneNote and Forms. Since we selected ‘other’ as the type of team, you will automatically have the tabs ‘Posts’ and ‘Files’, with access to video and audio calls. Now you can add any additional tabs you want the students to have. Since you’re creating a place for collaborative group work, a very useful tab is Microsoft Planner.
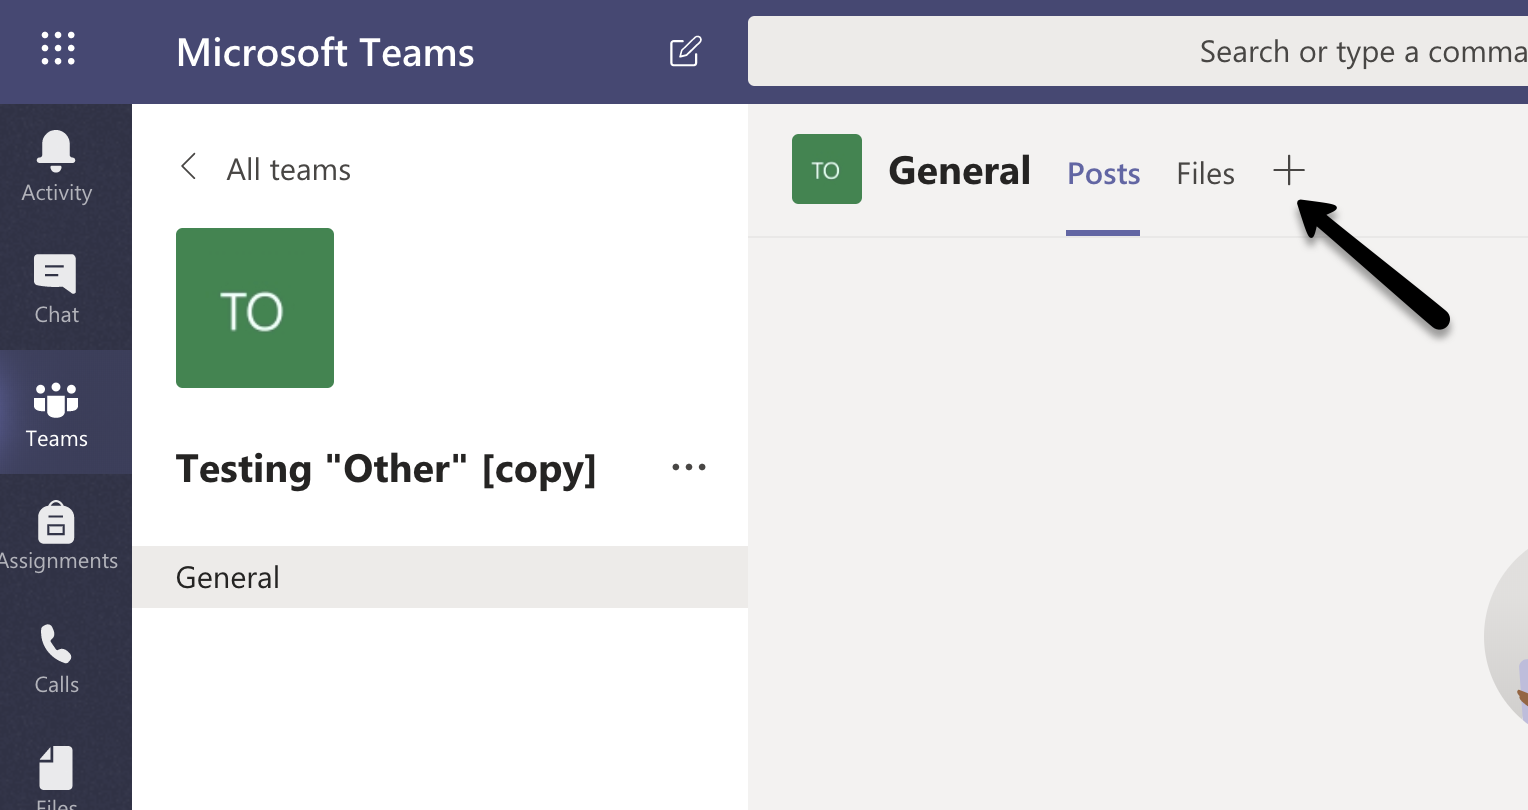
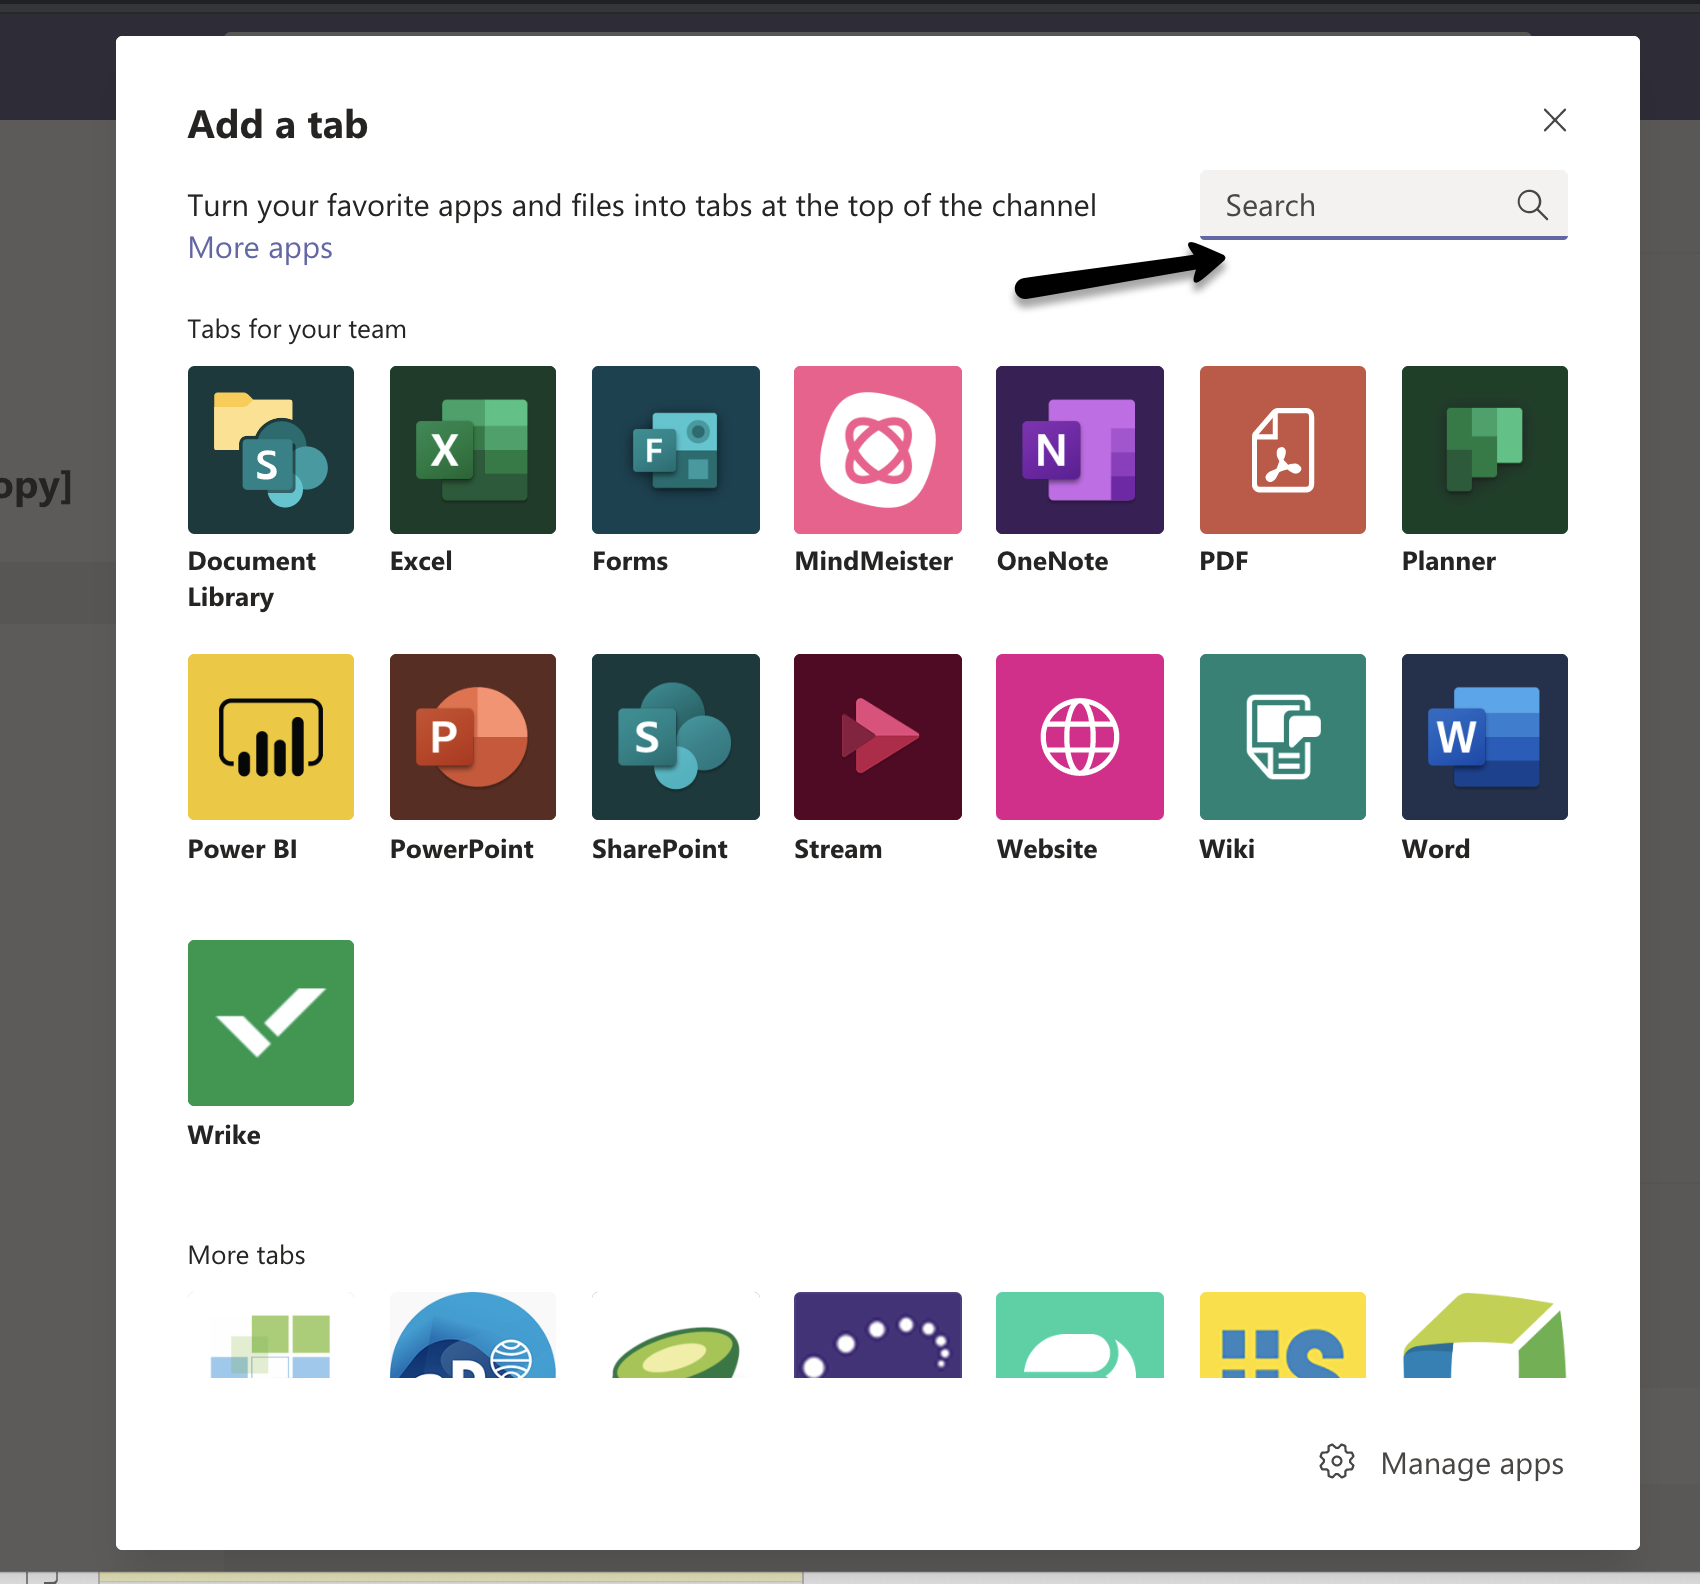
Step 7. Add Tabs to your Team (Optional)
To add a tab, click the ‘+’ sign on the top menu bar. This will open a list of apps and files that you can add to your team.
For example, to add Microsoft Planner, click the Planner icon and type in the name you’d like to use, which will also be the name of the tab in Teams. You can also leave this step for students to complete.
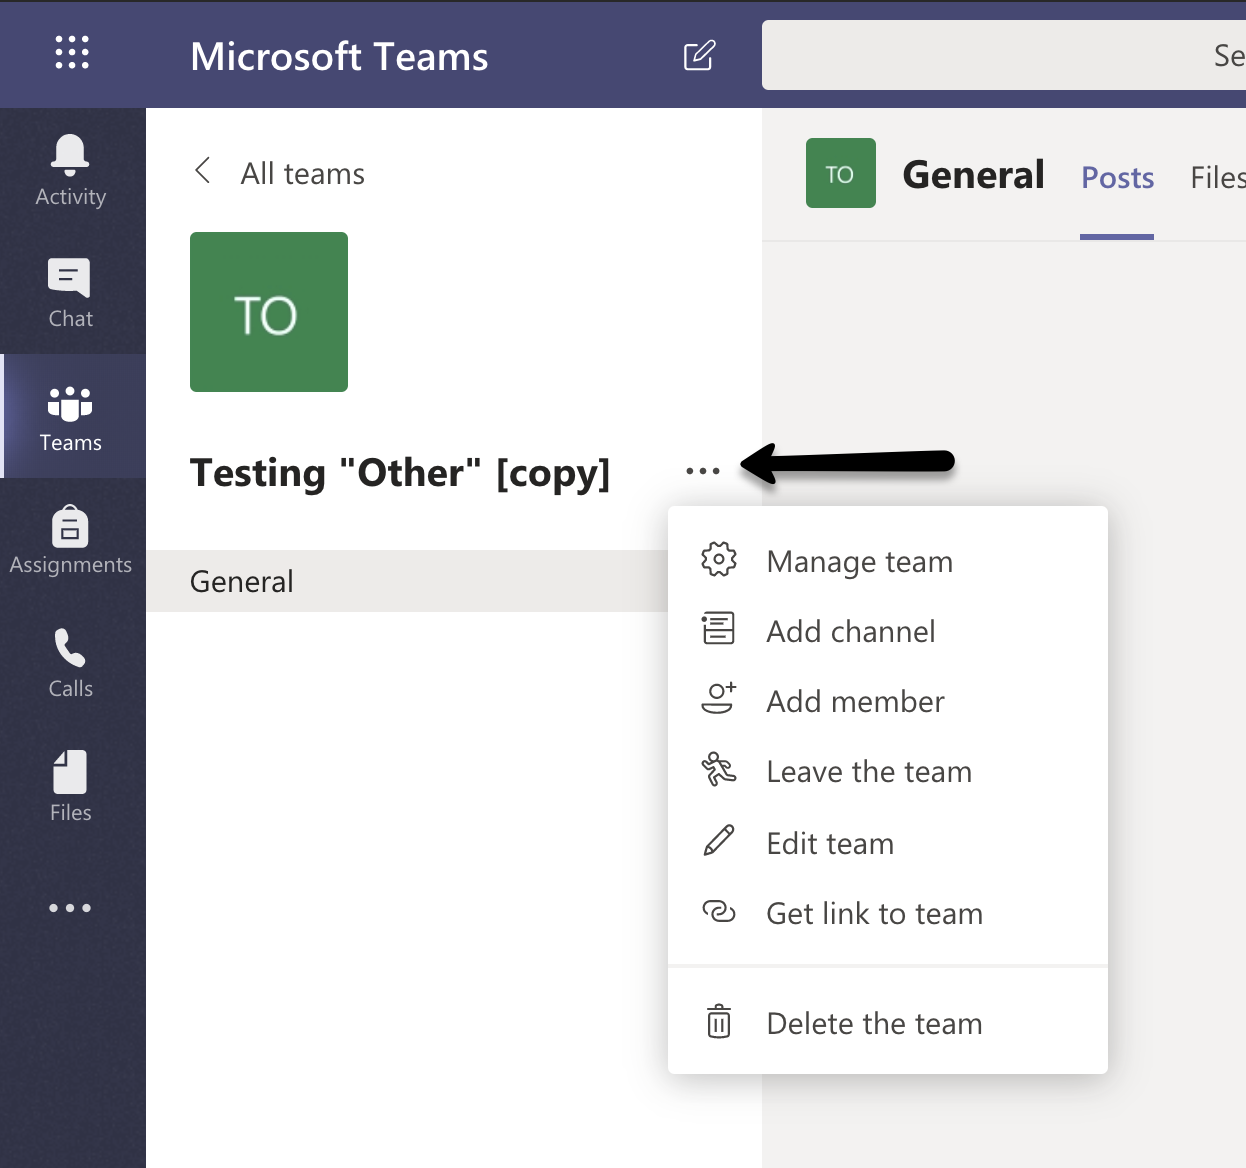
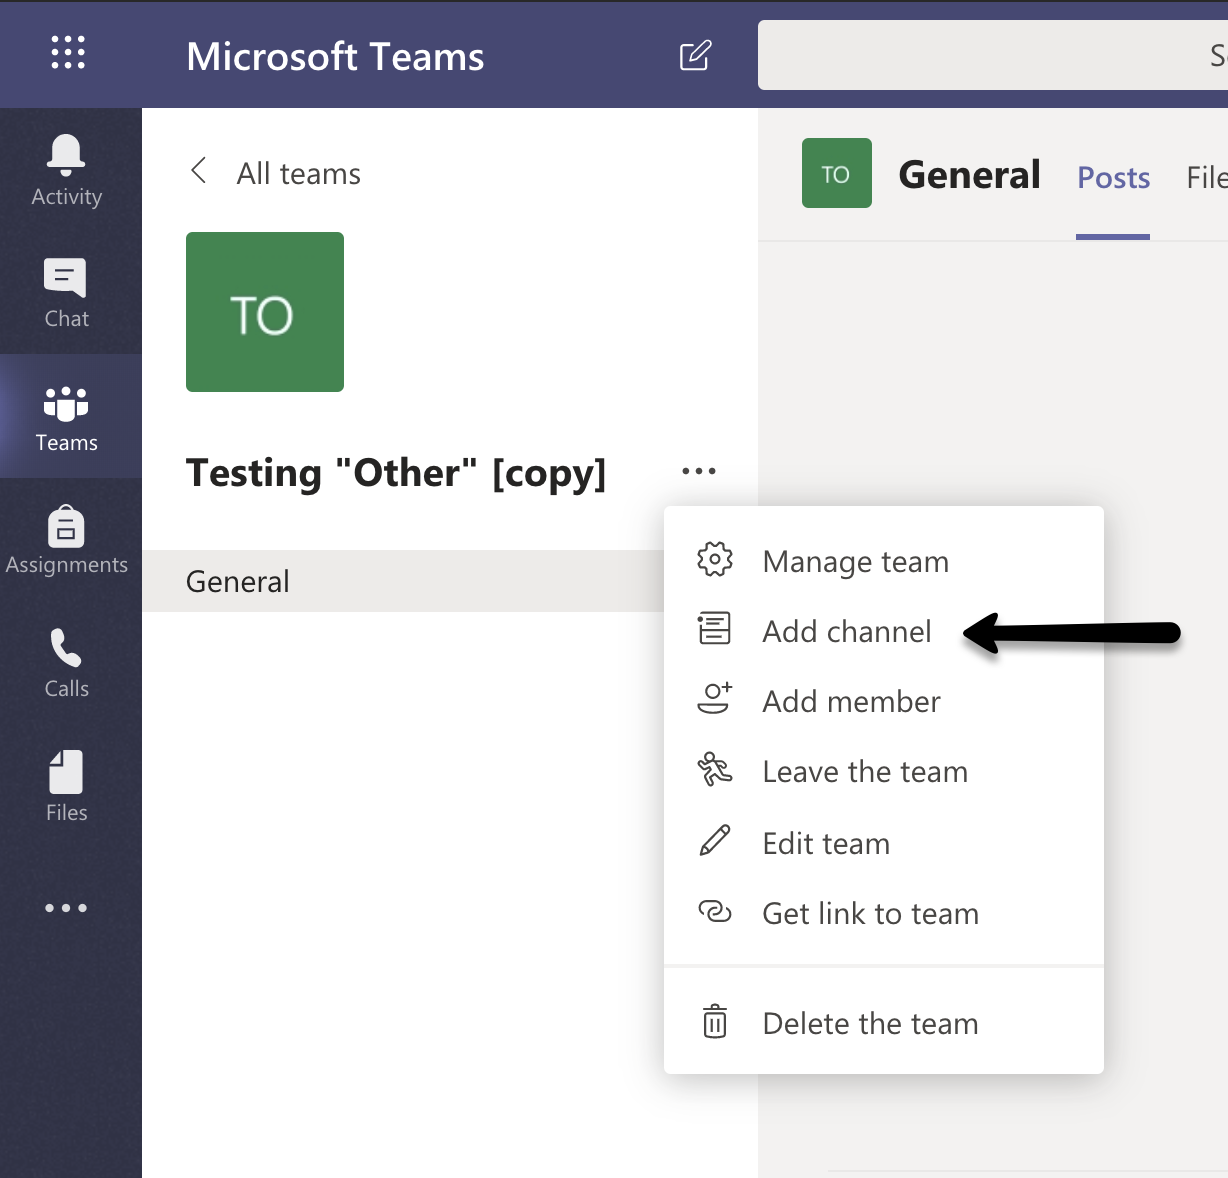
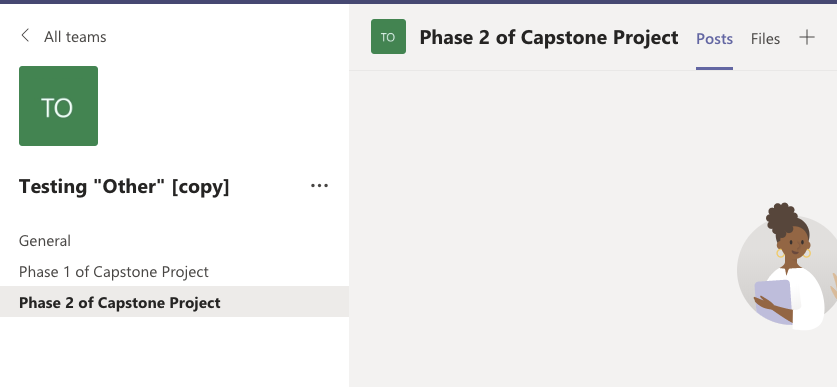
Step 8. Create Channels (Optional)
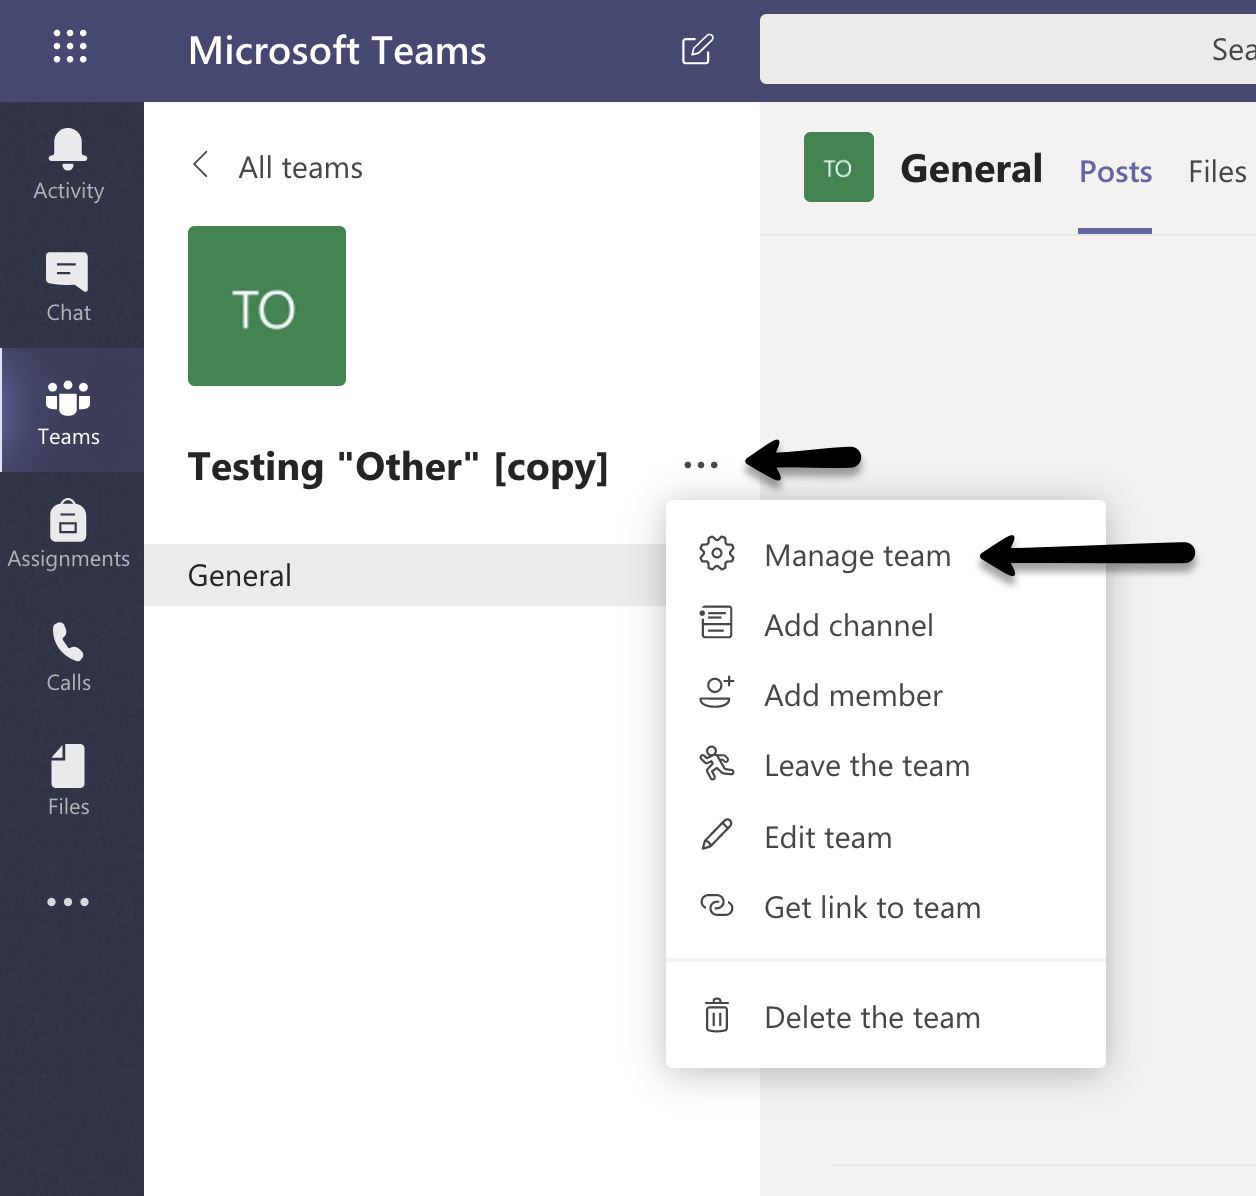
In the Teams environment, ‘channels’ are usually built for different topics. Think about ‘channels’ as different projects within a Team. Whereas, ‘tabs’ are different tools that add collaboration opportunities within a Team. Now that you have a structure for your team, you can add different channels by selecting the three dots (•••) beside the team name and select ‘Add Channel’.
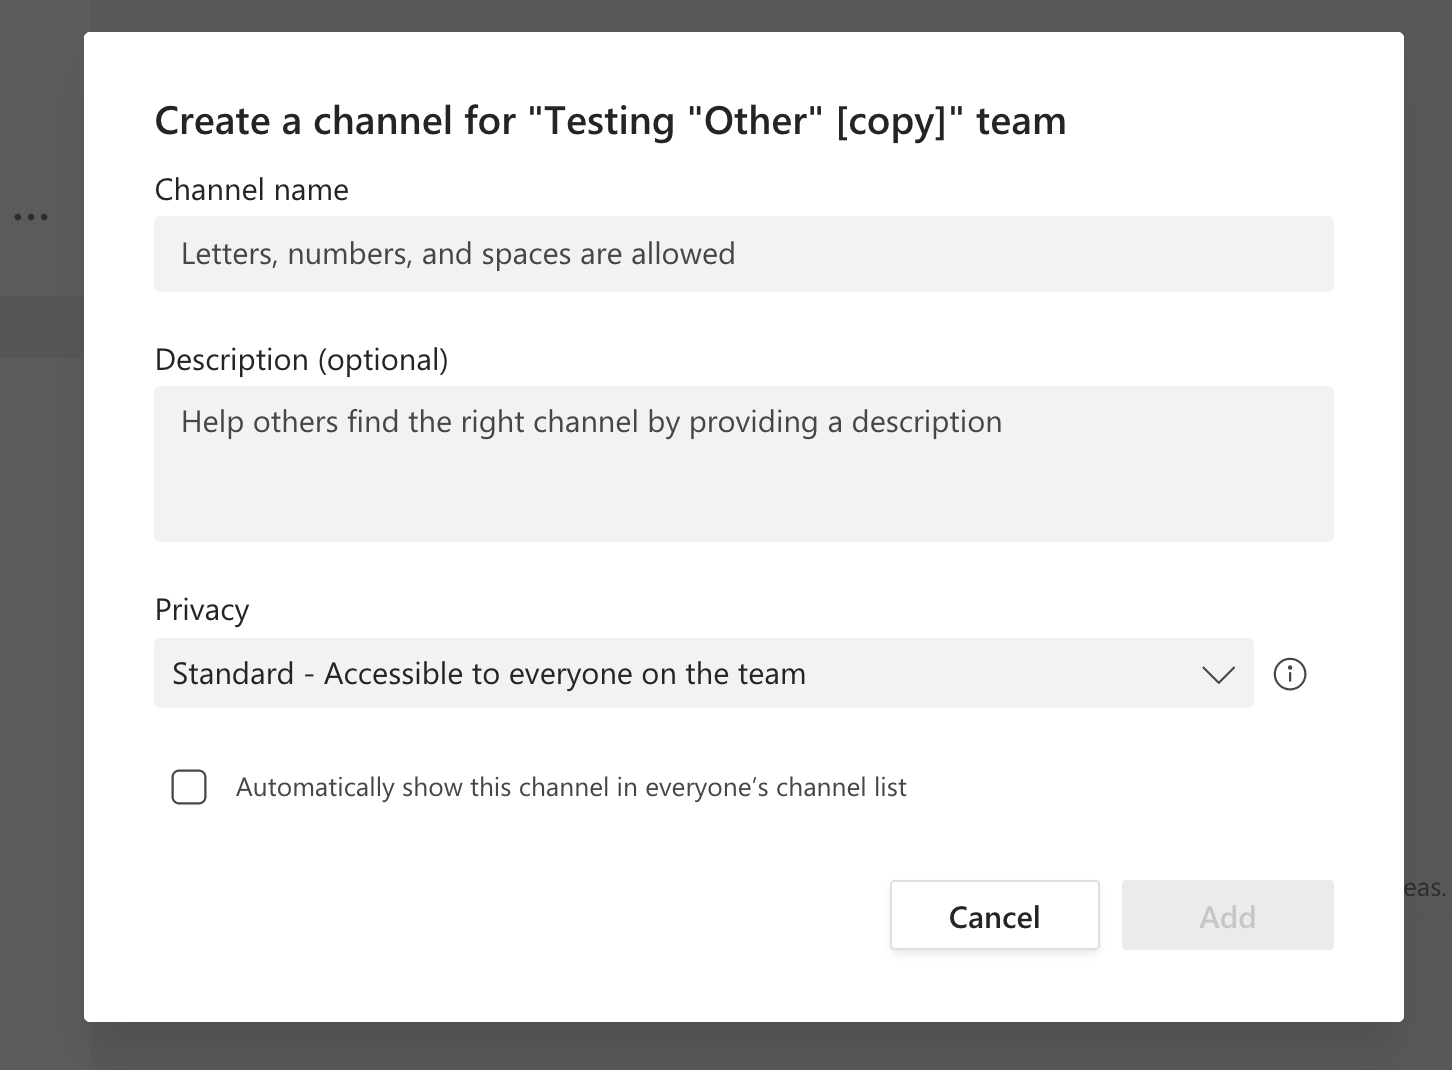
You will type in your channel name and set the privacy permissions. Students can also add their own channels if they break into sub-groups. You do not have to create channels.
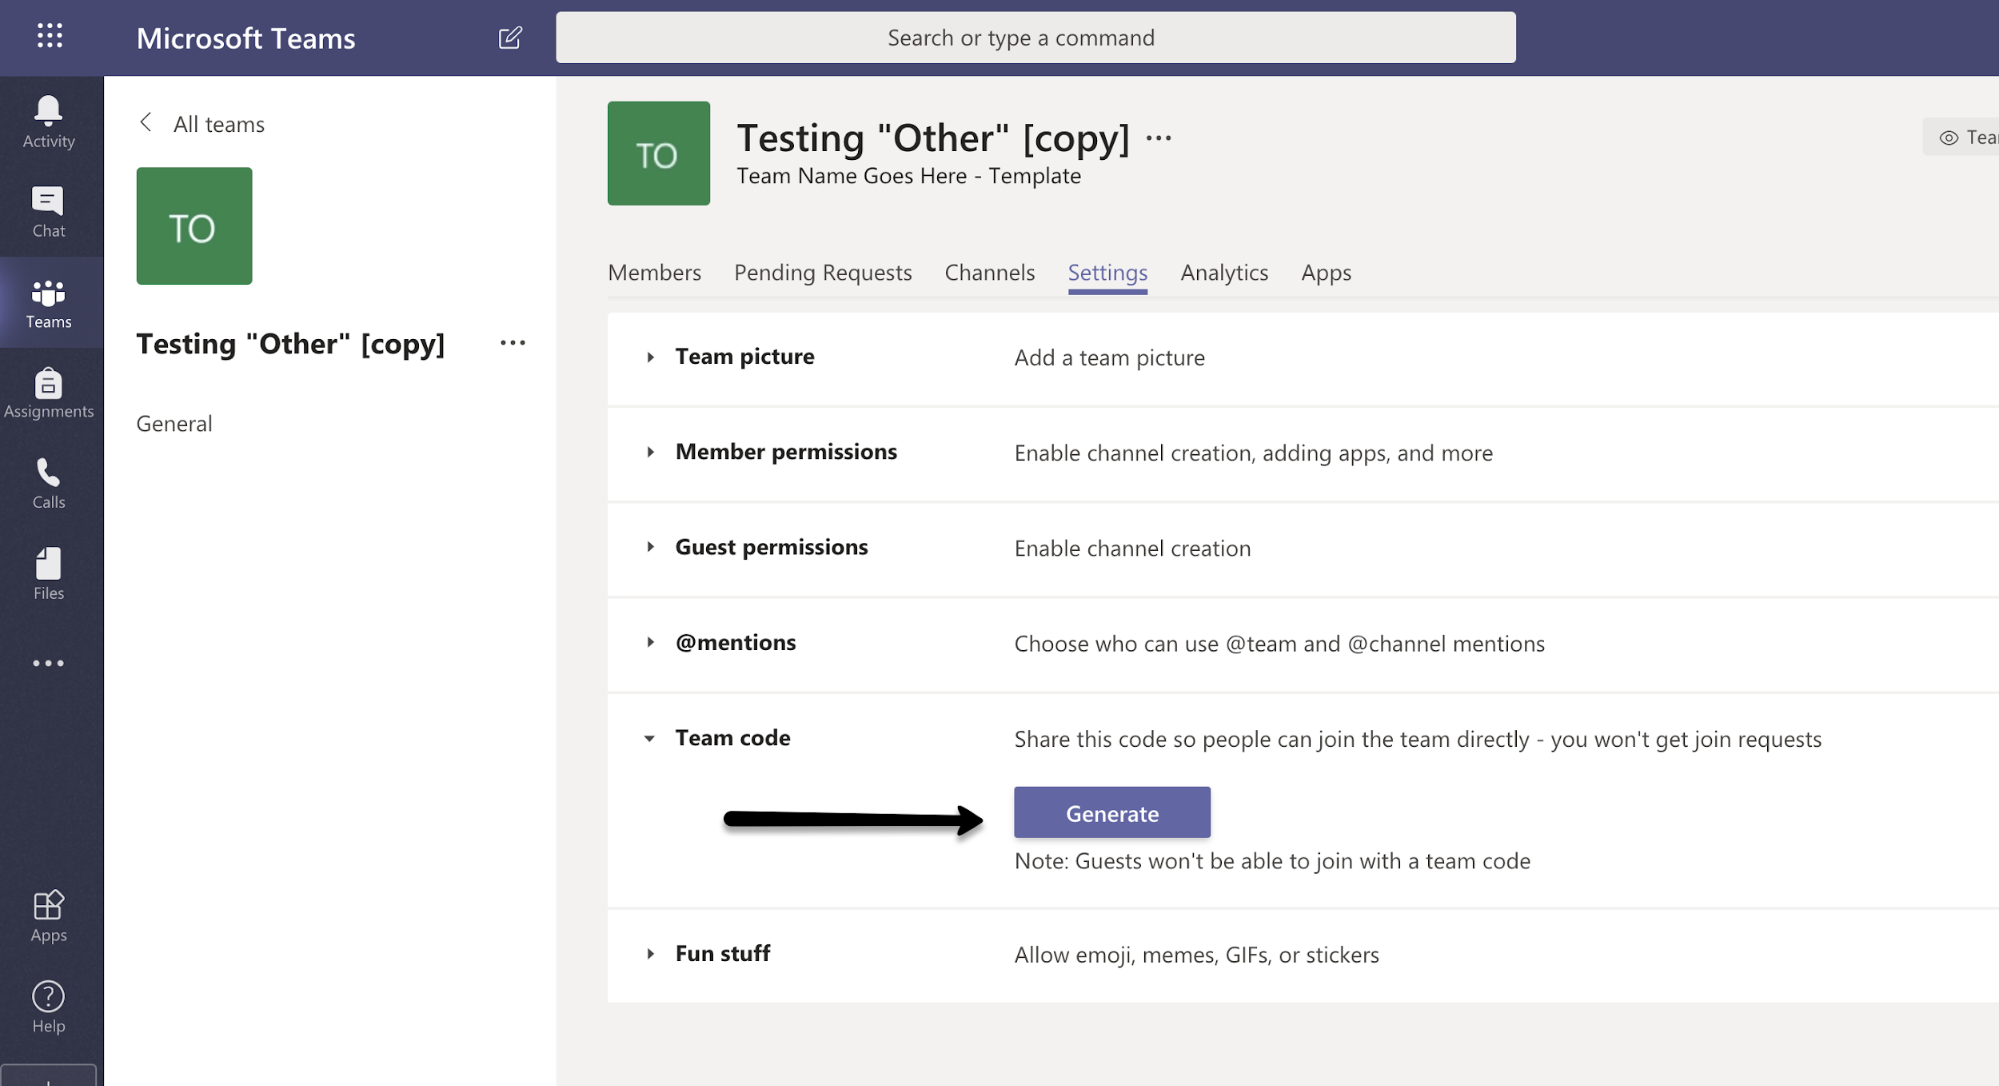
Step 9. Create a share code
If you didn’t share the team with students at the beginning, you can now create a ‘share code’. This share code can be provided to members of the team, allowing them to join. Go to the three dots (•••) beside the team name and click ‘Manage Team’.
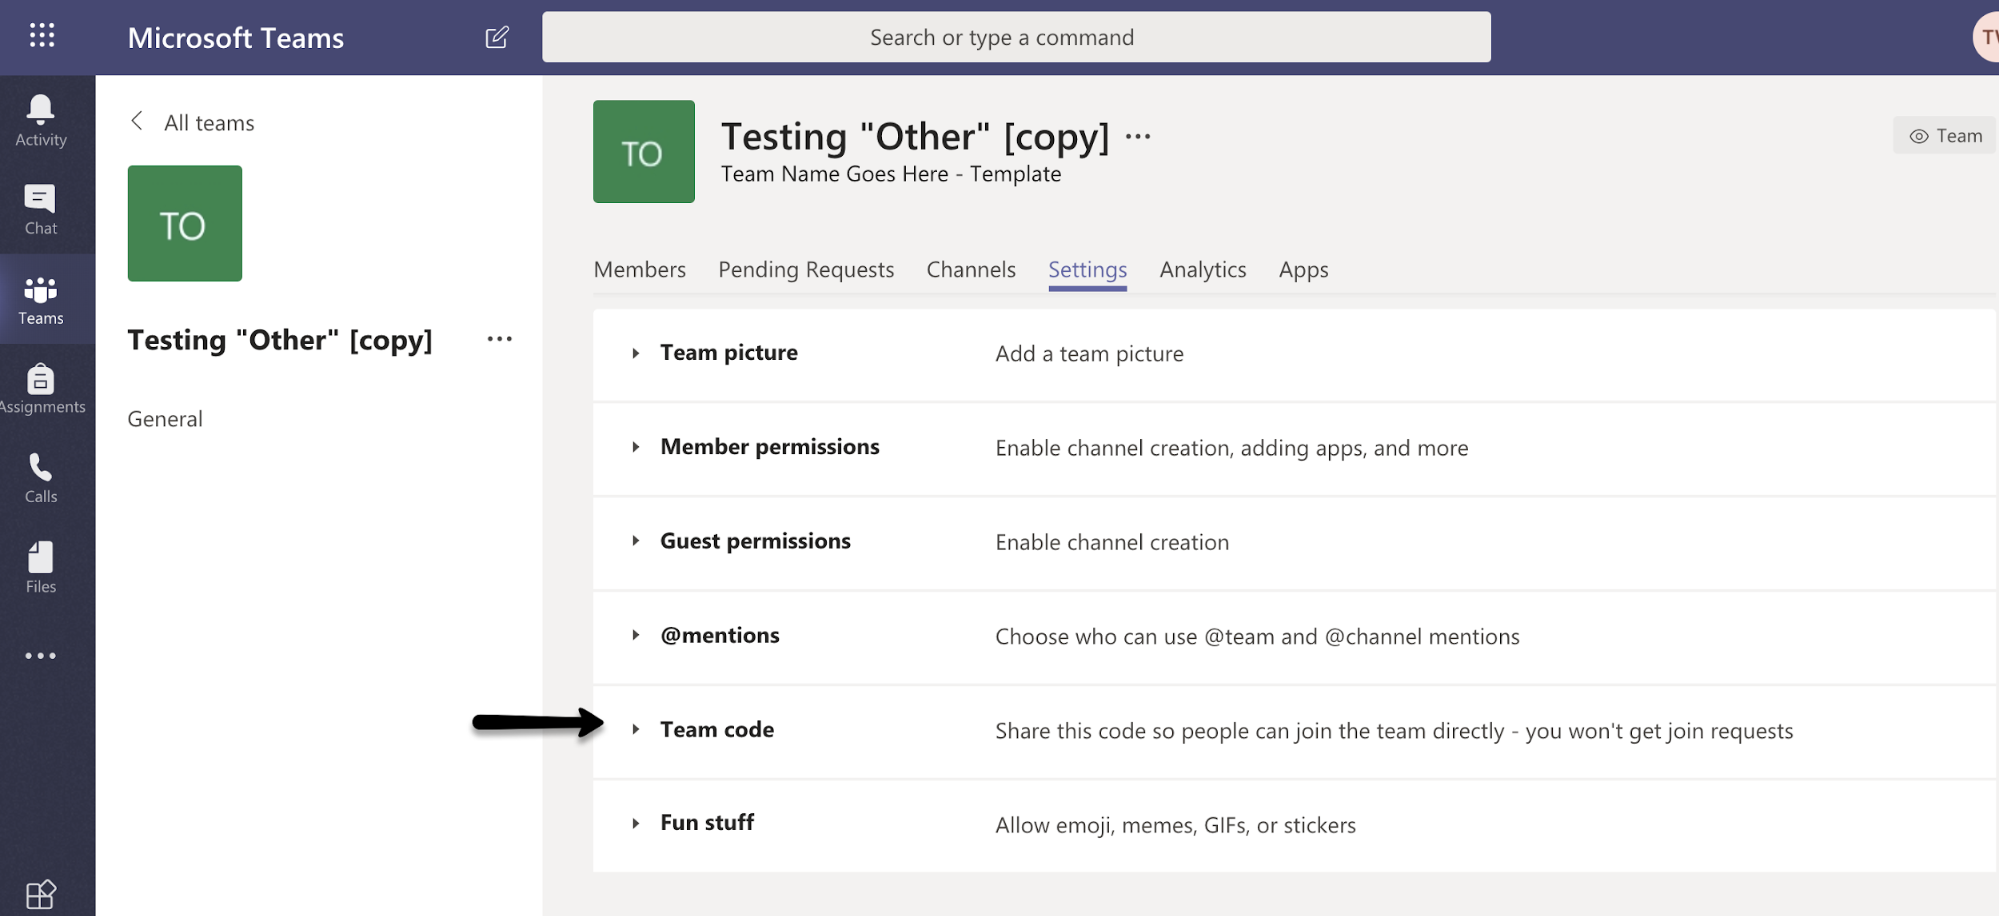
Then click the tab that says ‘Settings’.
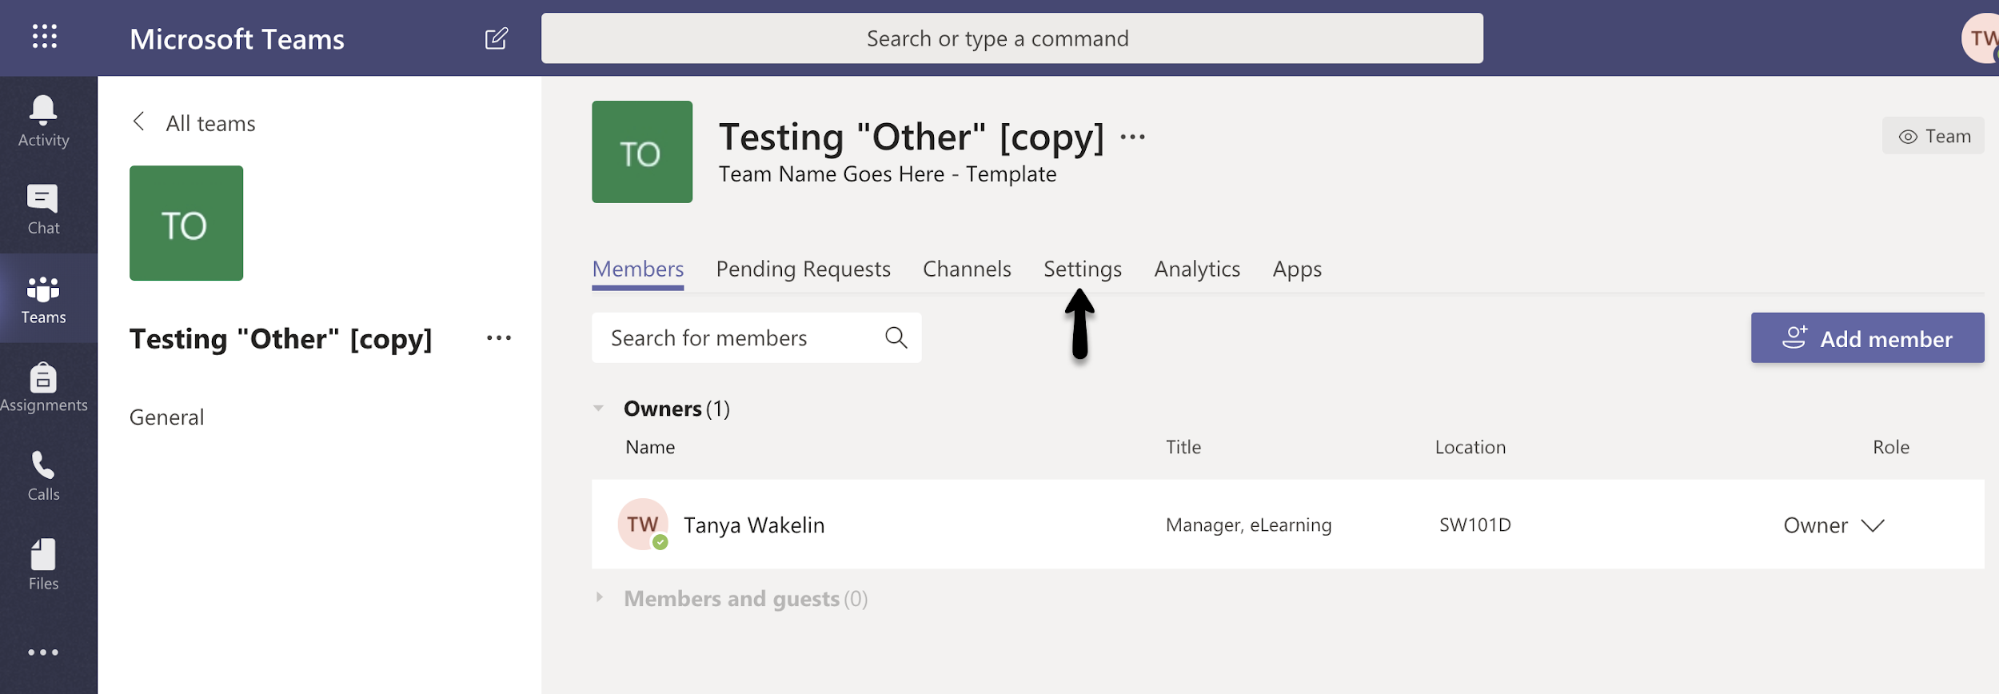
You will then see ‘Team code’, expand that section and select the ‘Generate’ button to create a unique code you can then provide to students allowing them to join your team.
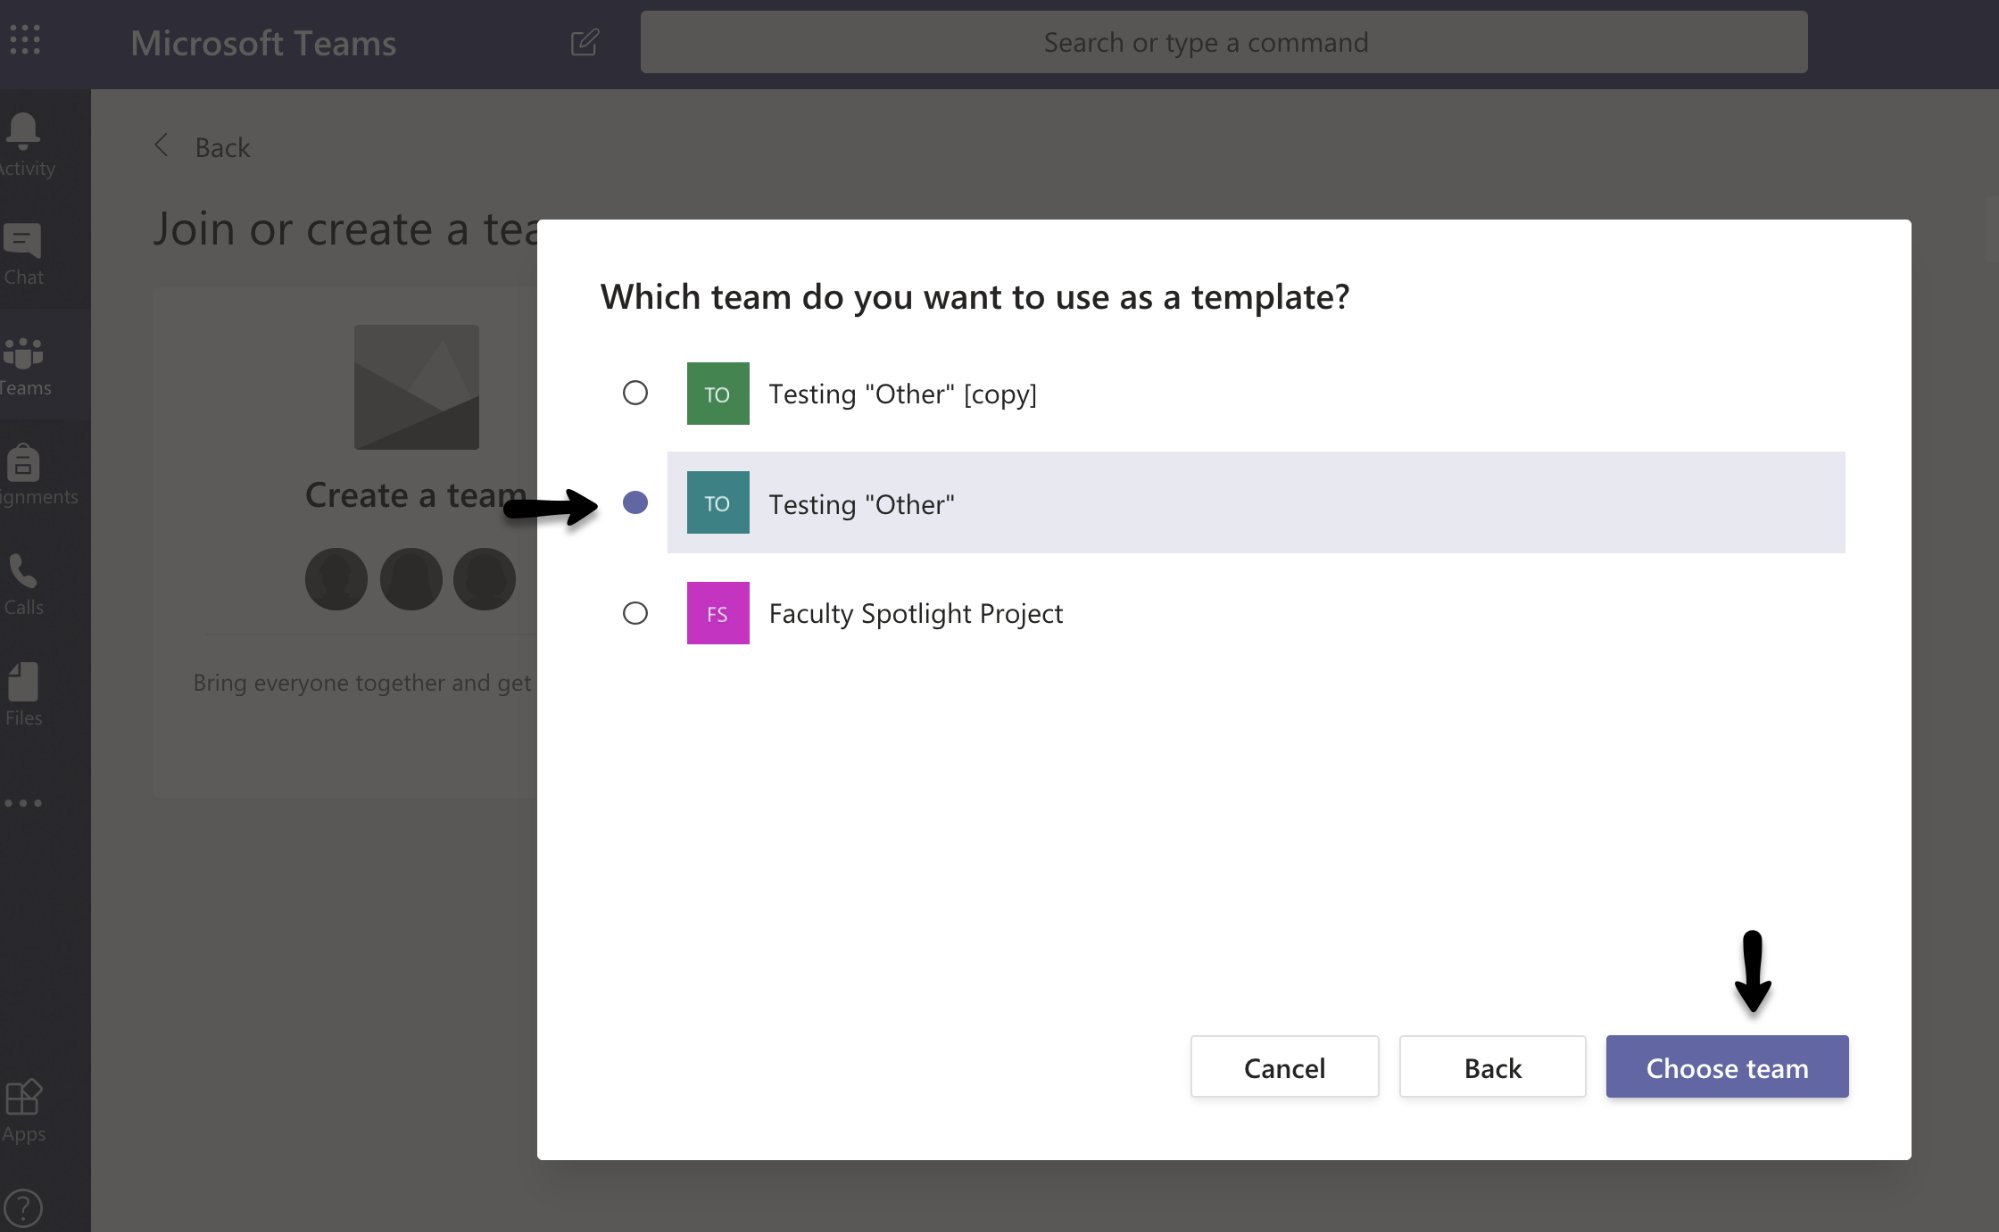
Step 10. Create additional teams
You have now completed creating a team in Microsoft Teams. You can choose to create additional teams based on this team as a template by following the steps below (optional).
|
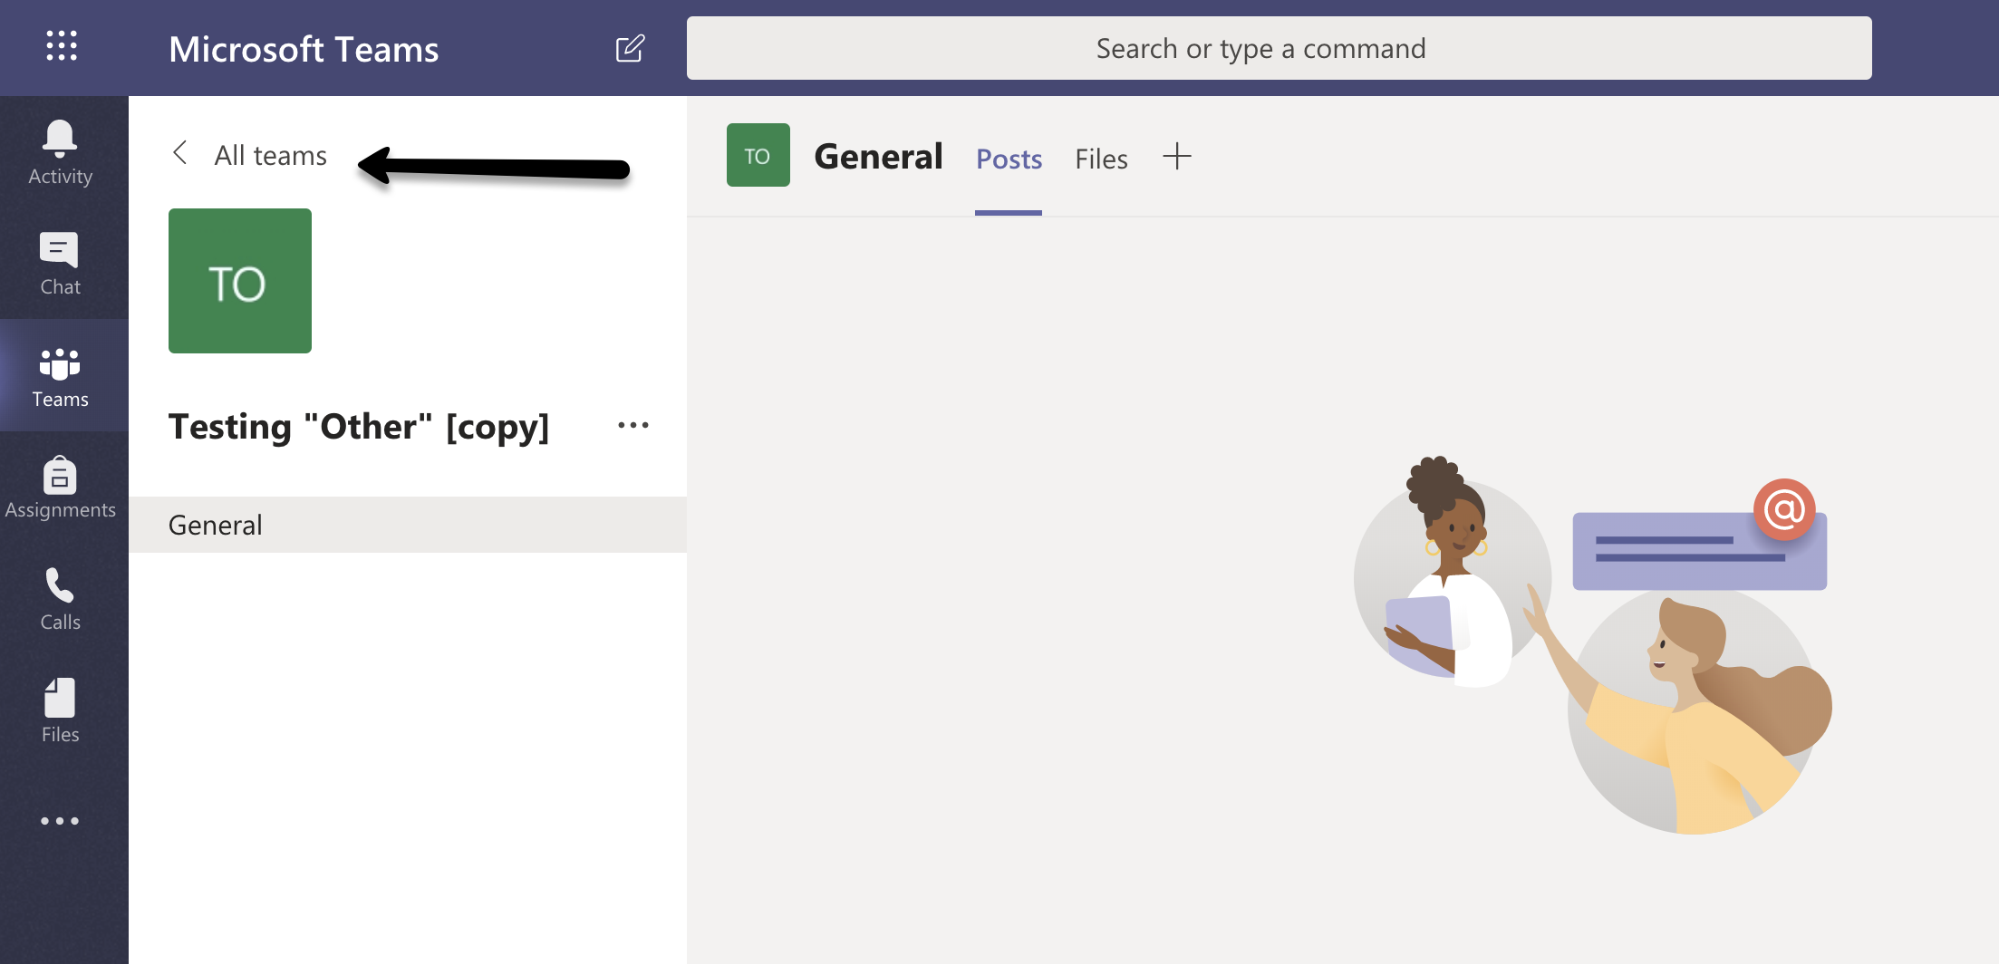
To create additional teams using the first team as a template: Go to the ‘All teams’ page.
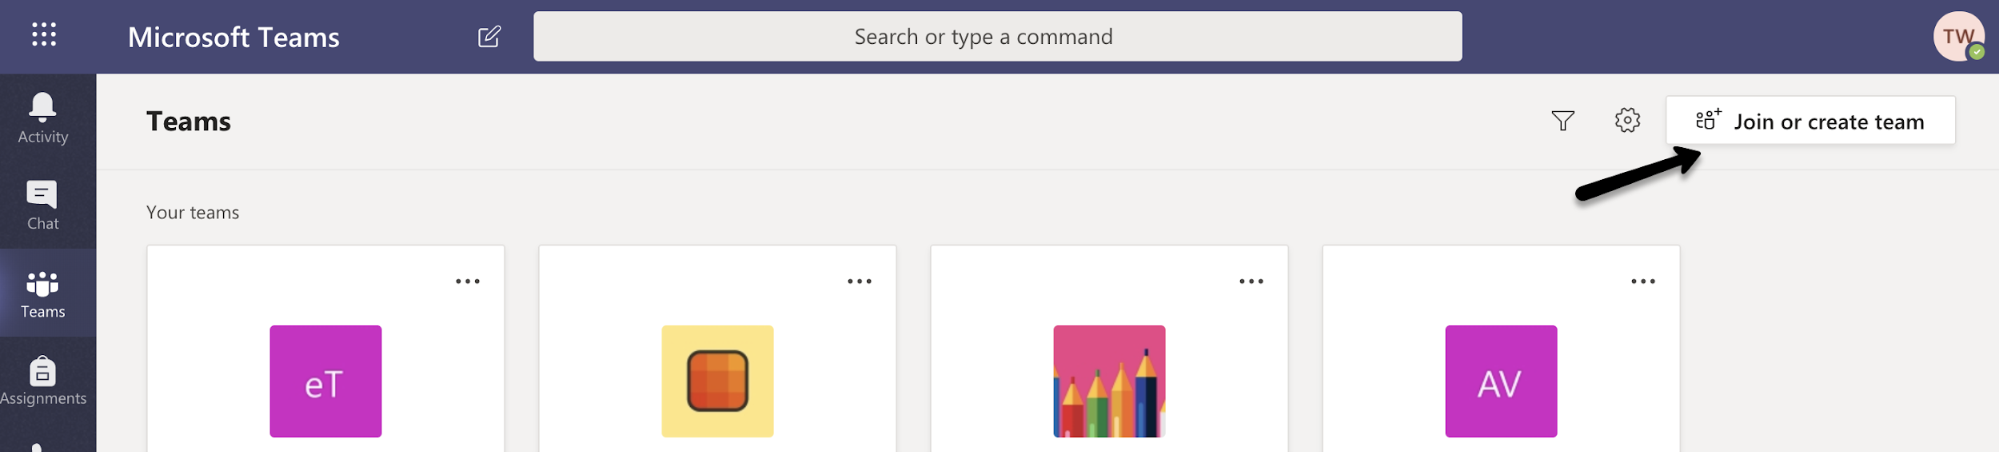
Click ‘Join or create team’, then select the same team type.
|
Step 11. Divide students into groups
Now that you have a few Teams created, you can divide students into groups and distribute the share codes.
- Pro Tip: Use your Learning Management System (LMS) to automatically create groups and assign students to a team. Then you can provide team codes to that group.
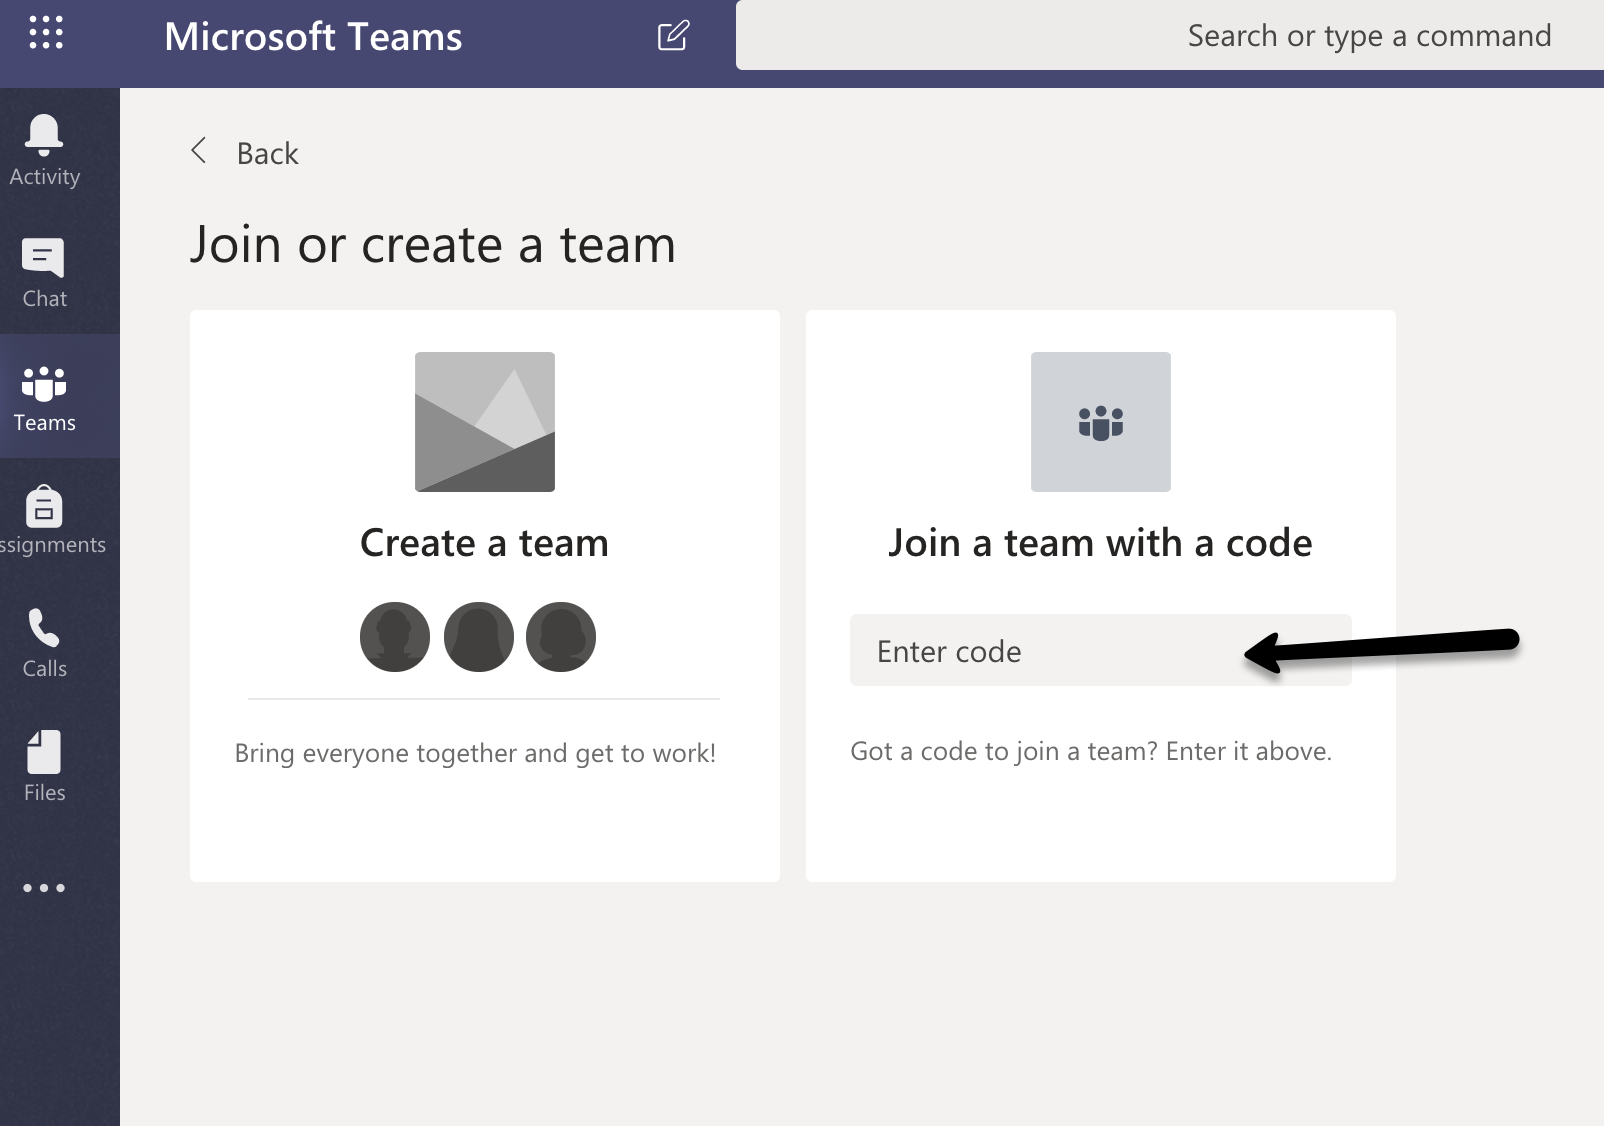
Instructing students to log in:
When students log into Teams, they can enter the team share code in the field that says ‘Join a team with a code’. This will automatically connect their account with this team. To ensure students know the robust collaborative features of Teams such as video conferencing, chat and how to add tools like Microsoft Planner, it is advised to share a few resources with them. Below you will find a template to share with students with resource links.
What Can Go Wrong?
- External apps may have certain requirements. For example, the tool ‘MindMeister’ (a tool for collaborating to create mind maps) as a tab in Teams can be added, but the team is limited to only three mindmaps. Keep in mind that many external tools have their own stipulations to the free version.
- Unmoderated group work tensions. The success of using Teams is providing students with the space to manage and collaborate on their own projects. This builds critical thinking skills, digital literacy fluency and interpersonal skills. Using Teams may mean there is the space for unmoderated group work tensions. By providing students with strategies on how to work together collaboratively and independently, you are turning this potential negative into a positive.
- Students don’t use the correct code. If a student doesn’t copy the team code correctly, they will not be able to log in.
Further Reading
Adams Becker, S., Pasquini, L. A., & Zentner, A. (2017). 2017 Digital Literacy Impact Study: An NMC Horizon Project Strategic Brief. Volume 3.5, September 2017. Austin, Texas: The New Media Consortium. Retrieved from https://library.educause.edu/-/media/files/library/2017/11/2017digitalliteracyimpactstudy.pdf
Gonzalez, J. (2018, August 5). Build a Collaborative Classroom with Microsoft Teams [blog post]. Retrieved from https://www.cultofpedagogy.com/microsoft-teams/
Microsoft. (n.d). Best practices for school leaders creating teams and channels in Microsoft Teams for Education. Retrieved from https://support.office.com/en-us/article/best-practices-for-school-leaders-creating-teams-and-channels-in-microsoft-teams-for-education-f3663ad9-a835-4971-9acb-6725a543c003
Microsoft. (n.d.) Meetings and Calls. Retrieved from https://support.office.com/en-us/article/Meetings-and-calling-d92432d5-dd0f-4d17-8f69-06096b6b48a8
UNSW. (2019). Team work is making the dream work. Retrieved from https://www.inside.unsw.edu.au/news-unsw/teams-work-making-the-dream-work
Template
Faculty Communication to Students Template
Author
 Tanya Wakelin is eLearning Manager at the Centre for Academic and Faculty Enrichment (CAFE) at Durham College in Oshawa, Canada.
Tanya oversees the development of learning objects and online courses, as well as faculty support for DC Connect and educational technology in the classroom. With a background in teaching, project management and online course creation, Tanya has a keen interest in utilizing technology that serves good pedagogy. Tanya has her Bachelor of Arts, a Bachelor of Education from Queens University, Masters Certificate in Project Management and is working on a Masters in Higher Education Administration and Leadership.
